Squiggles & Swirls Birthday

Stitch a Cheerful Celebration: The Squiggles & Swirls Birthday Card Tutorial
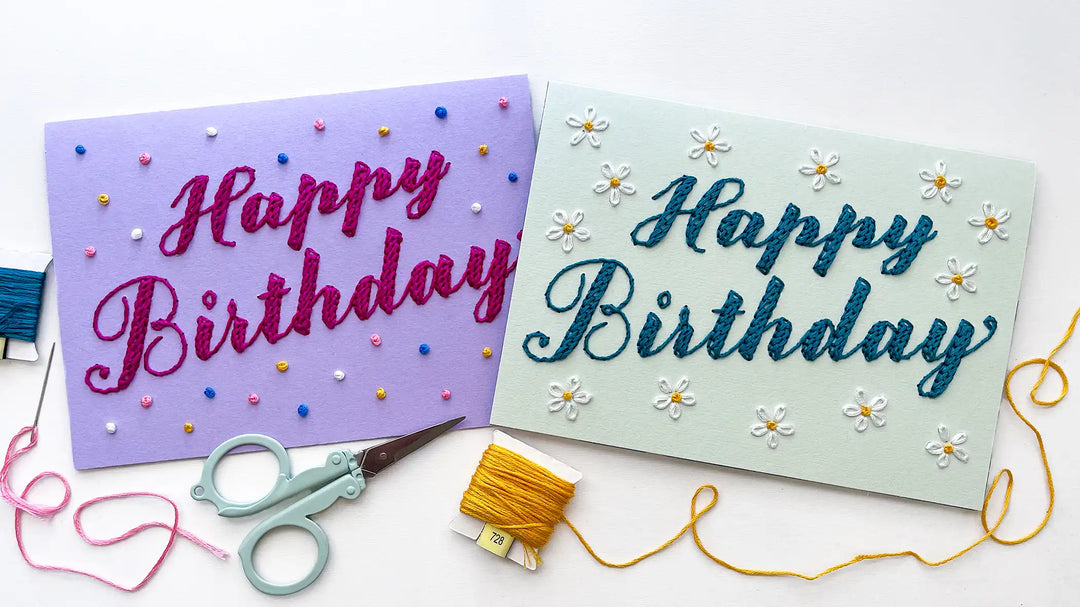
I’m so excited to share one of my most joyful designs with you today: the Squiggles & Swirls Birthday card! This pattern is pure happiness on paper, designed to be incredibly fun and cheerful. From the playful "Happy" squiggles to the delightful "Birthday" swirls, it’s the perfect way to stitch a handmade smile for someone's special day.
In this post, I'll walk you through the whole process step-by-step, sharing my best tips along the way.
Prefer to watch? Follow along with the full video tutorial here!
What You'll Need
-
Cardstock in your favorite color
-
Embroidery floss (I use a full six strands for this project)
-
A piercing awl and foam mat
-
Craft tweezers (optional, but helpful!)
Step 1: Prep Your Card
First things first, you’ll need to transfer your pattern onto your cardstock. As you can see, I’ve already transferred my pattern onto this bright and cheerful yellow card.
If you need a little help with this step, I have a whole video dedicated to my favorite transfer methods. You can watch it here.

Step 2: Stitch the Swirly "Birthday"
We'll start with the whipped backstitches for the word "Birthday." By stitching this word first, you give yourself a clear space to work and avoid any thread snagging on other stitches later. The foundation is a simple backstitch, which we will then "whip" with a contrasting color.

Sometimes in tight spaces, it helps to gently bend the card for better access. When that's not enough, a pair of craft tweezers is your best friend for gripping and pulling the needle through!

Pro Tip: To make the swirls look smooth and natural, "whip" your stitches in the same order you would write the letters by hand. For example, on the letter “B,” you would first create the vertical backstitch line, and then whip the two curved parts of the letter.

Step 3: Add the Exclamation Knot!
Now for the fun little dots! To continue the multi-color effect, we'll combine three strands of each thread color to create one thick, six-strand thread.
To make a French knot, bring your needle up through the paper, wrap the thread around the needle three times for a nice, chunky knot, and go back down into the paper in the same hole you came up from.


Step 4: Create the "Happy" Squiggles
Finally, let's bring the word "Happy" to life! This is done with a threaded backstitch. First, lay down all the backstitches for the letters. Then, go back through with your second color to create the fun threaded squiggles without piercing the paper again.
 Pro Tip: As you complete the squiggles for a single line of a letter (like one of the vertical lines on the "H"), it's a good idea to secure and tie off your thread on the back. This lets you adjust the loops in that one section perfectly without accidentally loosening or tightening other parts of the letter.

Also, pay close attention to your stitch guide! It shows which direction your first loop should go to keep the squiggles looking neat and consistent.
Finishing Up Your Masterpiece!
And there we have it—your very own Squiggles & Swirls Birthday card, stitched with love and personality!


This is such a rewarding project, and it’s so easy to make it your own just by changing up the thread or card colors. If you'd like to learn how to neatly cover the back of your stitching for a professional finish, you can find a step-by-step video for that here.
I hope you give this fun pattern a try. Thank you for joining me today!
Happy Stitching, Sara